Monday, February 2, 2015

2015 garden plan with nice pictures

This year i'm trying out a new gardening method called the Mittleider method.  It's a method of using synthetic fertilizers with natural minerals to get maximum yield.  At first I was a bit hesitant to use synthetic fertilizers but since i've gotten into hydroponics i've changed my mindset a little.  For me, the main focus is to stay away from herbicides and pesticides.  So we'll see how it works out.

As a note, i'm not following it perfectly, because the method wants me to move my beds farther apart (which I will do if we ever move to another house, and if it does awesome I might do it here too).  So instead of following it perfectly I'm planning on doing companion planting to help keep down on bugs (one of the benefits in the Mittleider method's spacing between beds is to cut down on bugs).  So it's not a perfect example, honestly the Mittleider method is a lot easier since u generally plant one plant per area of your garden.

I used a crazy tool that I wrote myself (with the help of some starter js) which you're welcome to use, but I warn you that if you don't know javascript really well it'll only be soo useful.  http://jsfiddle.net/BmLLh/77/

To use, you just click the 2" or 4" or 36" etc to get a circle that is the size of the plant you want to plant, and then you can drag it around.  It's setup to be 4' by 5' (1/2 of my 4x10 beds) which was perfect for my needs.  If you know css you can change the size, if you know javascript you can add more spacing circles.

Here's a few pictures of my grow beds for this year.
Bed 1 - Contains my tomato guild (which I'm having twice in 1 bed).  Tomato, Lettuce, Potato onion, carrot, radish, kale, beet, nasturtium, spinach, thyme, and basil.  All work nicely together for keeping down on bugs and helping one another.
Bed 2 - Cucumber and celery guild and my pea (mostly potatoes though) guild.  Cucumber guild: cucumber, beans, celery, kale, chinese kale, spinach, nasturtium, rosemary.  Pea guild: onions, peas, beans, carrots, potatoes, marigolds
Bed 3 - Contains my Corn and Winter Squash guild and my Zucchini and bean guild.  Corn Guild: sunflower, butternut squash, corn, lettuce, and spinach.  Squash Guild: squash, zucchini, fenugreek, beans, radishes, marigolds, rutabaga, spinach.

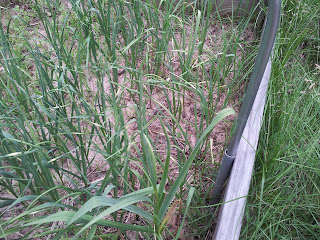
 These are beds 4-6, note, 1/2 of each of these beds currently has garlic in them, so i'm just showing the other half of each.  Really each of these are just a continuation of the bed before it

Bed 4 - Another Tomato guild
Bed 5 - Another Pea guild

Bed 6 - Another squash guild
 The hardest part of this will be planting :), but it should cut down on weeds and bugs.  We'll see how it works out, and hopefully next year be doing the full mittleider method to see how it compares.

Also this year I plan on making some videos of the garden to show how it progresses, so stay tuned.

Total Plant count:

Lettuce - 33 plants
Onions - 70
Peas - 24
Chinese Kale - 16
Kale - 13
Potato - 60
Spinach (and Arugula for some of them) - 109 (probably overkill)
Rosemary - 2
Marigold - 22
Beets - 24
Carrot - 27
Potato Onion - 24
Radish (some will be random carrots) - 226
Tomato - 15
Beans - 17
Thyme - 6
Turnips - 40 (these will become 40 Rutabaga in fall)
Basil - 3
Celery - 19
Nasturtium - 5
Sunflower - 3
Corn - 16
Cucumber - 4
Fenugreek - 10
Butternut Squash - 2
Squash - 3
Zucchini - 3

Saturday, July 19, 2014

Yardlong Beans from Seed to plate

Growing the Beans

This year (and last year) I planted Yardlong Beans.  These are basically your normal green beans, but they grow to be 18-24 inches long (or so).  Last year I planted them with the express purpose of saving seeds.  I only had a few seeds, and it worked out great.  We had hundreds of seeds left over and this year planted those seeds.

In the planting I planted 1 row about 7 feet long, and I just put several beans in the small canal in the dirt and covered them up.  I then put up some $10 metal posts from lowes on either side, and used some twine to make a little fence for them to grow up.  It works pretty well, except they like to climb up poles rather than working up the fence, so they spin around things instead of moving up the fence.  But it's ok, a little training and they've done really well.
That's about 7' wide, notice they like to climb up the hoophouse
posts rather than growing up the fence.  Next year i'll use all posts
I also noticed that in my other garden plot a few seeds must have gotten dropped in because about 10 or 15 plants started growing, about 3ft across or so.  I had a few eletrical conduit posts (I used in my greenhouse post earlier to hold down the plastic), so I just stuck them in the ground about 2 feet apart in the middle of the beans, and the beans have done extremely well climbing up the 2 posts as a group.  The posts are 10 feet tall, and today a few of the plants have almost reached the top.
Notice they're within a foot or 2 from the top,
that's at least 8 feet up (1 or 2 feet in the ground).
These seem like the easiest way to grow these,
and 5 or 10 on a poll doesn't seem hurt them.
About 1 or 2 weeks ago they started growing flowers.  They grow flowers in groups of 2 pointing away from eachother making a little V.  These flowers then turn into small green sticks that continue to grow for a few days until they're 20 inches long or so.  They turn lighter green when they're ready, and turn brown and dried out when they're ready to have their seeds saved.
These are the flowers, the beans just start
growing out of these after a few days.

Today's Harvest 7/19/2014

Today we didn't have a vegetable for dinner (the kids were so disappointed) so I decided to go pick whatever beans were ready.  I got out there and was pretty surprised to find 41 beans ready to pick.  Now if these were normal green beans then 41 beans wouldn't be any big deal, but these are yardlong beans.  I weighed them (after removing the top and bottom) and they came out to 15.84 ounces.  So basically 1 pound of beans for dinner.  Not too shabby :)

While picking I only picked the larger beans, so we'll see how many i get and how often, but for only 11 ft x 1ft (1 row) these things make for a great harvest.  If anyone in the St Louis area is interested in any seeds for next year I should have plenty :).
Ignore the socks :), but these are the beans.
That's a yardstick next to them to show how long they get. 

Here's the end so it's easier to see the numbers, notice
they're all about the 20 - 24 inch mark
(though the tops aren't perfectly lined up).


Update - Today's Harvest 7/22/2014

Today we did another harvest.  18.02oz (1lb 2.02oz).  There are a few that are a little over age wize, they're yellow, must have missed them last time.  And there are plenty of small ones still out there.  But this is today's harvest.  Not bad, last harvest was 3 days ago so it seems like so far there is 1 lb every 3rd day.  I'll keep updating as we go.

Update - Today's Harvest 7/24/2014

Today we did another harvest.  9.5 oz

Saturday, July 12, 2014

Garlic Update - 2nd year for Martin Heirlooms, 1st year for Music

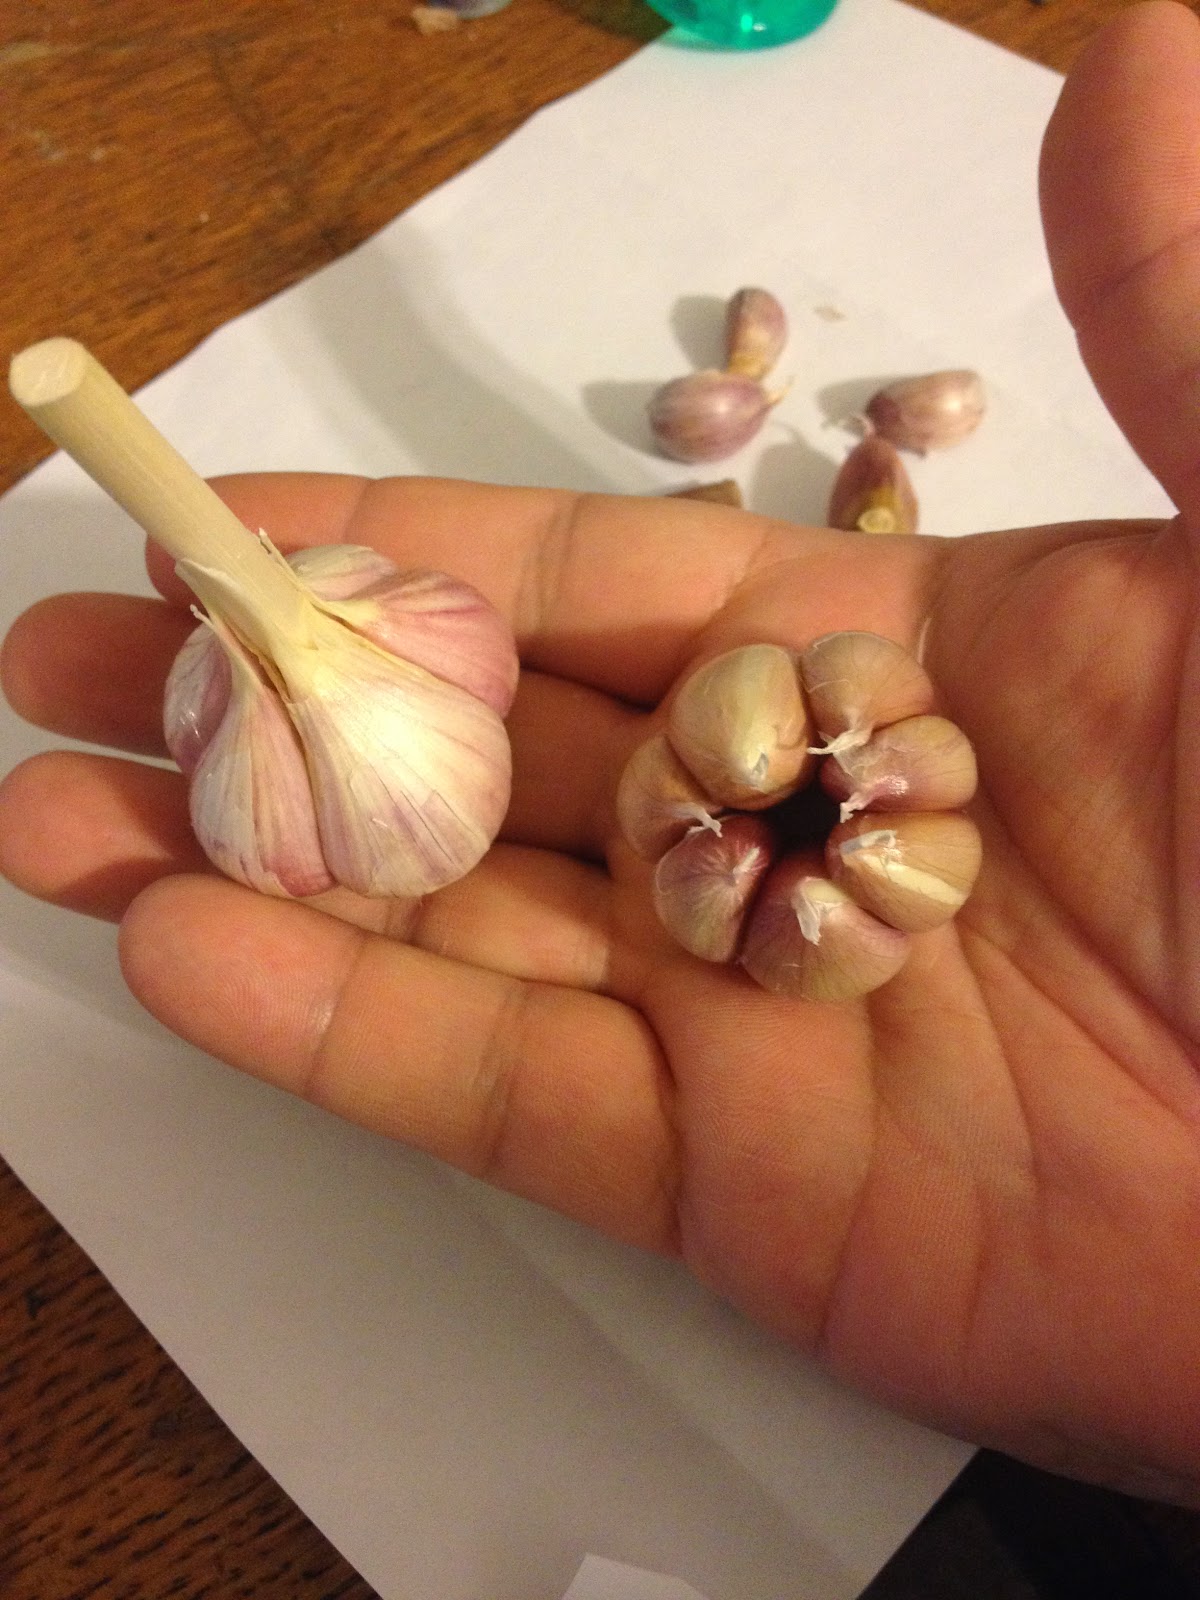
This year I got Music Garlic planted, and Martin Heirlooms.  This is the 2nd year for the martin heirlooms.  These cloves are about 2/3rds the size of normal cloves on the larger blub sizes.  The music garlic on the other hand is looking really nice.
These are the martin heirloom bulbs.  Note i have tons of cloves, and
am only keeping 10 of the biggest cloves so if anyone else is
interested let me know :) (before next year)

I'm going to run a test to see if i can pull the cloves out of the garlic heads and they can still last til september/october for planting.  So i'm pulling apart 2 heads.

Here's pics of the latest.  I'll update this thread later this year or next when i know how they grow.

I'm also hoping to plant these ones close together so i can see if they're smaller on average.  If they're the same basic size this means that i can pull the largest cloves each year and they don't have to hang there for months.

The cloves were about the same size, which
is good, but the heirlooms hopefully will get
bigger this next year.  They also hold more
cloves, 5 for music, 7 for MH
Notice how much larger the music cloves are on the left, vs the younger heirlooms on the right.  Hopefully next year they'll both be the same size :)


Monday, May 12, 2014

How to build a grapevine trellis

It's supposed to be a really windy weekend, and I looked outside and sure enough the small 6ft steaks i've been using to "trellis" my grapevines are blowing all over the place in the wind.  It's been this way for a few days, but what can I say i'm lazy :).

Well today I finally decided to not be lazy, and I finally put together my grapevine trellis, and I must say it's working great.

Steps:

Step 1 - is to go to your local "buy all your home goods" store (lowes), and buy

  • 4x4 outdoor post 6ft tall - you need 2 of these, one for each side.
  • 4 eye screws (they're basically just screws with loops on the end)
  • 200 feet of bailing wire (or multi-purpose wire), I got 16 gauge stuff, and 200 feet isn't important, just so long as you have "enough"
  • 2 of These bad boys (these were where I was being lazy, and i'm really really happy it did) - If you don't get these, then get 9ft or 10ft tall posts above, and a shovel, and a strong back :).
  • Turnbuckles - I found these at lowes and just bought the biggest ones they had.  These help tighten up the wires
Step 2 - hammer in "those bad boys".  Give your plant at least 3 or 4 feet and hammer the posts in, try and get it straight up and down.  I would recommend getting a 6 inch piece of 4x4 wood so that you can sledge hammer it in easier.

Step 3 - Put the posts in, and screw them in.

Step 4 - Now it's time to use the eye screws, I used 4 so I could make 2 lines of wire, but you could easily do 3 lines, up to u (i might even add another one myself, it's pretty easy).  If you do 3 lines, make sure to get 3 turnbuckles.

Step 5 - Add the wire, and the turnbuckles.  I made the turnbuckles near one of the posts, but i'm sure it doesn't actually matter.

Step 6 - Tie the grapevines to the trellis, I used small pieces of bailing wire, and didn't make them very tight.  The 16 gauge is thick enough that I'm not too worried about them digging into the vines, but I also made them pretty loose.

Step 7 - Enjoy :), though if you're like me the next step is to find a good way to add netting to protect against birds.


Best Pictures I could take:
Notice the loops if you can see them.  Also see that I kept the
old posts I had and just tied them to the wire.

Other post on the other side. 

This grapevine is much happier now (or I am anyway)
Notice that i found the best vines to train along the wires, these will grow the
full length.  Also, you'll notice a little on the right the turnbuckles that I got.

All in all I have to say, for a couple hours of work this was much easier than I was afraid of.  Especially with the e-z post guards.

UPDATE:
If I had to do this again, which I'm sure someday I will, I'd have used one way anchor vices instead of the turnbuckles and eye holes.  Would have made things a lot easier.

If you're interested in growing grapes, This video series is simply amazing (dry :), but amazing)

Sunday, July 21, 2013

Update - Seeds, Garlic, and mint tea

Well, it's been an eventful summer here on my little garden.  The Zucchini I tried I put out too early and it got bitten, and hasn't done well at all.  I'm ready to pull it out when the next flower just drops off.

I ate my first 12in long bean, which was probably a bit early even for it, these things are supposed to get really long.

I picked out all my garlic, let me see if I have a picture somewhere:


I can't stress how helpful these greenhouse posts have been.  They're perfect for hanging the garlic to dry, and also nice for reaching the middle of my raised beds without stepping on the dirt.  Very very awesome.  Notice the garlic bulbs are a little sad, but still it's the first year i've ever tried it, and I put them in late.  Hopefully this years will be better :).

I got out several multiplier onions, all ranging from about ping pong ball to a small baseball size.  Looking forward to putting the ones that last the winter back in in the spring.  A few that came from seed have grown, a couple that look pretty nice, i'll try and grow them all next year to see if any of them are promising.

The lettuce has finally gone to seed, and i've gotten about 200 black seeded simpson seeds so far from 1 plant, we'll see how many i get total, it's not slowing down.  I also got about 100 romaine lettuce seeds, we'll see if they mix at all.  I'm going to plant them pretty soon when I get the zucchini out.

I planted some new kale seeds in the front where there's a lot of shade, we'll see how they do in the summer.  I was planning on planting another plant or so every week to see when the best time to plant kale is in my yard, I'm hoping to get as much kale as possible :).  I'll keep this updated with pictures and all that in it's very own post as things progress

I got some more basil and cilantro planted out in the front yard.  The mint in the front yard is growing well, and one of them isn't, it's odd.  But today I picked some mint, about 5 or 6 sprigs, and boiled them in a few cups of water to have my first herbal tea from the mint.  It's pretty good stuff, with just a little honey.

I'll keep everyone updated with images and all that, but it's been a while since my last post.


Saturday, June 22, 2013

Garlic Scapes :) and Garlic flowers

My Martin's Heirloom Garlic bulbils have been growing really well, and pretty much all of them have scapes (well, they did until I cut them all off and attempted to make garlic scape pesto).

I've been reading up how to get garlic to go to seed (not a normal process, normally they go to bulbils or whatever it's called).  I decided to take a few pictures of the process.

One of the things that I've found is that scapes are smaller than i thought, they're a little bigger than a spagetti noodle, but not much.  The heads at the end are about the size of an eraser when I pulled off the outer protecting and began pulling the bulbils out 1 by 1.  It's a hard process, especially with the mosquitoes, and often ends up in a few of the flower heads falling off.  But in the end the bulbils are plucked out and the flowers are left so that they can grow and become seeds.  I'm hopeful that they'll get better and better about going to flower so that i won't have to pull the bulbils out as much.

Anyway, here are the pictures:
Here you can see the scapes on all the garlic.  Note that
because they're bulbils i've been able to place them very very close together.
This is what it looks like before I start pulling
off the bulbils.  I have to cut through the outer
protective layer, and then pluck off the bulbils
one by one.

See how small those little flower buds are?  it's difficult to remove the
bulbils without pinching out the flowers as well.

This is the finished product.  There might be 1 or 2 bulbils deep in
there, hopefully some of the flowers still go to seed.

All in all it takes me about 5 minutes or so a garlic scape.  I've done about 9 of these, and I left on 4 or 5 to grow to bulbils and the rest I cut off to make pesto out of.  It's been a fun little project.

Thursday, May 16, 2013

Pictures from the garden, early 2013 - radishes, onions,blueberries, and beets (going to seed)

Hey, I just wanted to get together a bunch of the photos i've been taking here and there in the mornings as I wander round the garden.

Newly planted blueberry bush from lowes (it's now got some
blueberries on it, though i'm not sure if i should pick them off or not, i'll have to look)

My other new blueberry bush


This is a new method i'm trying (lots of work, but it's fun).  The cardboard holds the cups steady, and they're inside a normal black planter box.  These cups have been growing really really well for me.  At some point i'll show you the tomato plants downstairs. These are green peppers, sage, and daisies.

Radishes always do great :).  You can see some of the red bulbs
if you zoom into the picture.  I'm going to leave as many as I can,
6 or 8, to go to seed so i can get radish sprouts.  Sorry about the shadow :) it's early morning

The spinach is starting to come up.  Will have to
thin them a little when I find out which ones are the strongest


I'm happy with the shallots, they're doing well.
This shallot only has 1 onion, but it's the largest stalk by far.
It's even got a little scape growing on it (that's what it's called
for garlic :) not sure what it's called for onions)
these 3 beets are getting ready to start the year

Notice this picture a week or so after the one before,
it's growing well.  These are beets in their 2nd year going to seed.

This is what the early stages of a beet flower looks like.  The beets
are full of these little flower heads getting ready to burst.  Should
get plenty of seeds out of these 3 beets.